
And now for the first of our [DEVELOP] photography challenges for 2013! For our first month we've picked out four challenges based around combining multiple exposures. (Read the introduction to the project here).
-Multiple Exposure
 |
| 1940s Multiple Exposure American Ballet Theater ballerina Alicia Alonso executing a pas de bourree. Photo taken by Gjon Mili, 1944. Source here. |
Digitally this result can be achieved either in camera (check your manual to see if you can do it) or in post processing by layering multiple images on top of each other.
-Pattern Layer
 |
| I love these double exposures done in camera by Christoffer Relander. Source here. |
-Harris Shutter
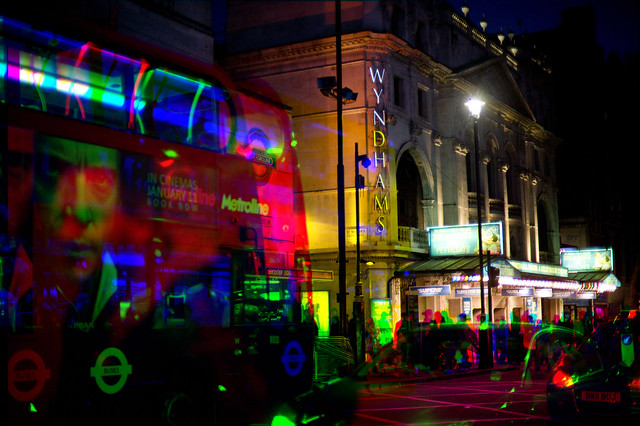 |
| A photo we captured on New Year's Day near Leicester Square |
Harris Shutter is like a colour split version of multiple exposure. In it three photos are combined each with a different colour. The result is that moving objects are seen in one colour and stationary areas of the photo show up in full colour.
To do this you'll need to shoot a string of three photos (moving the camera as little as possible between shots). To create the colours you can use colour filters on your lens if you have them. Or follow our instructions below to get the effect digitally:
Open your three images in photoshop (or another program- Malc's got a post coming up on free software option).
Pick your first image, select the channels window and make all the channels invisible except the red channel. Your picture will now be black and white. On the layers window click the half moon icon at the bottom to create a new adjustment layer and select 'solid colour'. Change the red 'R' value to 255, the 'G' and 'B' values both to 0. With the new red layer selected change the blending mode to 'Multiply' from the drop down list at the top of the window. Now flatten the image.
Choose your second image and repeat the above steps, this time isolating the green channel and setting 'G' to 255.
Next repeat on your third image but this time set blue.
Paste all of your images into the same file as separate layers. Change the blending option on the top two layers to 'multiply'. Ensure the contents of all three photos are aligned, then flatten and save!
-A Multi
Fancy working with someone else on this one? Make a friend and pair up your images! A multi person multi exposure.
You could agree a theme each shoot a set number of images and then combine them digitally. If you've not found a friend to work with why not post your image on our Facebook event and see who has a picture to add to yours.
Or if you want to go for a more authentic photographic experience: whip out a 35mm film camera, shoot all the frames in a film and rewind it, leaving the end of the film poking out of the canister. Pass it on to a friend so they can shoot over the same film a second time. Then have it developed (its a good idea to warn the technician that the film is an experimental double exposure so they know what to expect as they develop it).
Make sure you share your results with us!
(By the way, there wont be 4 challenges each month- we're just taking it as it comes so sometimes there'll be lots of projects to try out and other months just one thing to really get stuck into.)